Fyrakk the Blazing
|
|
|

Preparation
Bloodlust
Lust can be used on either first set of adds in phase 2 or to burn the boss during phase 3. We'll start with lusting the first adds to help prog. Later when we get to phase 3 we'll see if we can move lust to the boss.
Damage Potions
Check the logs for your spec to see when they are popping their damage pots. There are two options:
- Potion on pull and potion in phase 3 during lust.
- Potion at start of phase 2 and again in phase 3.
The advantage of option 1 is that you get to pot during lust. If potion scales significantly during lust for you, this is the option you'll find in the logs. The advantage of option 2 is that you use potion twice after the 70% boss transition when boss damage starts to matter. For some classes, using potion twice outside of lust is more boss damage than using potion once during lust.
Macros
Create a macro with this text:
/run WeakAuras.ScanEvents("LIQUID_PRIVATE_AURA_MACRO", true)You will press this macro when you have the Molten Eruption debuff in phase 2. This is the same macro we used on Smolderon.
Nerfs
Strategy
Phase 1
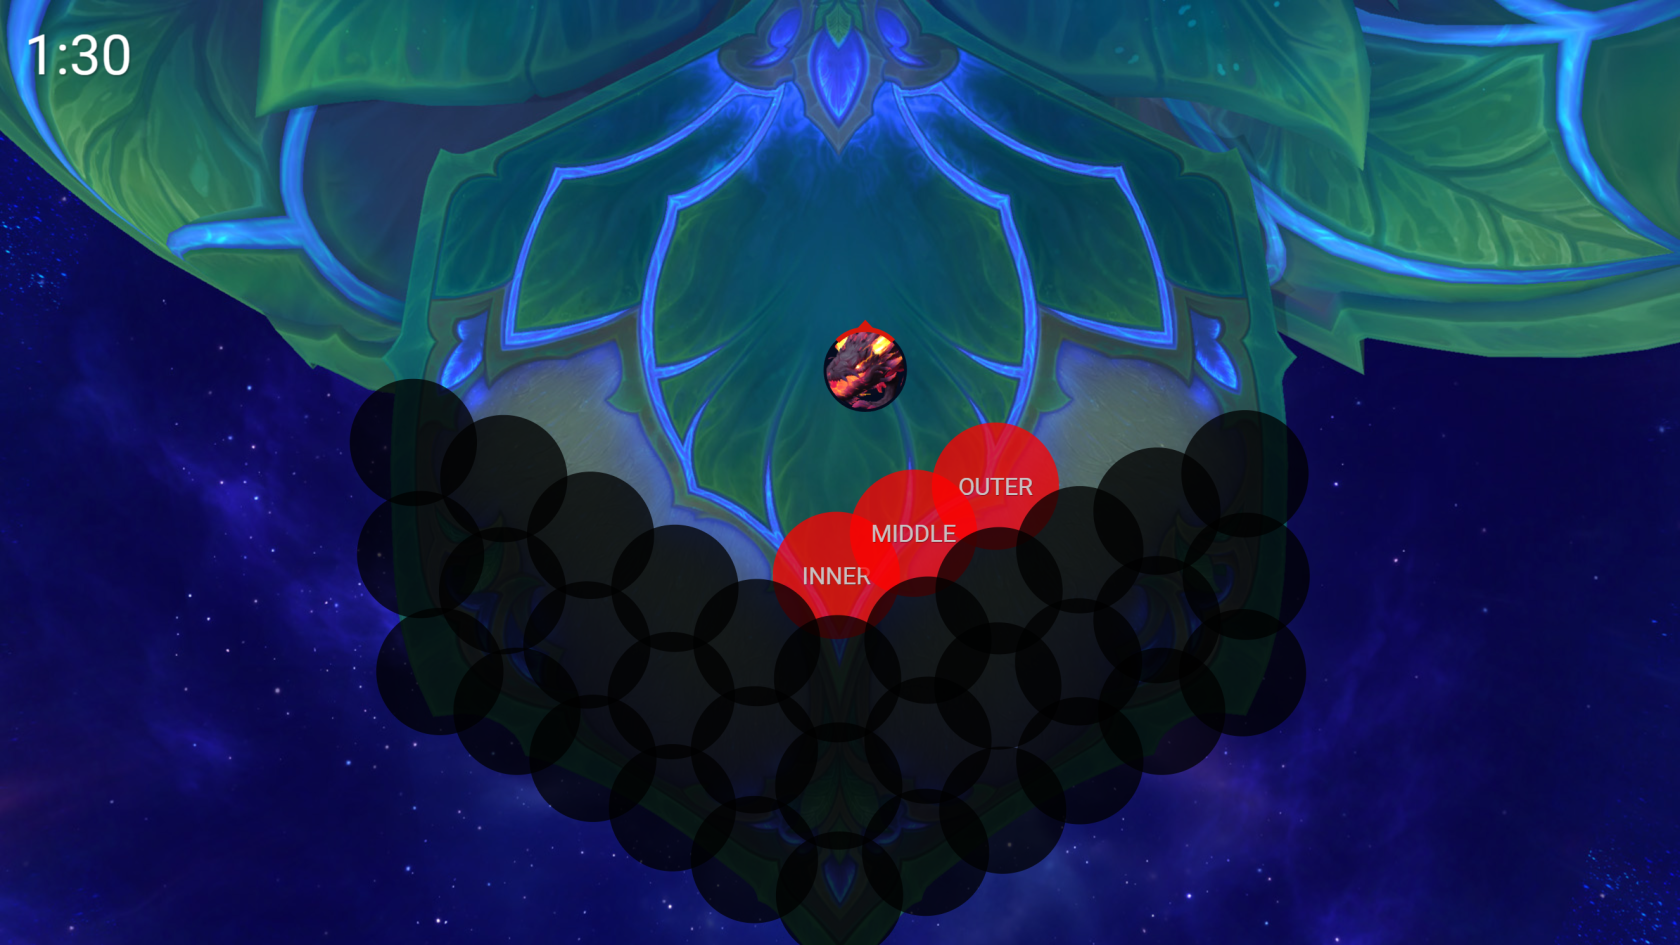
Begin by pulling the boss forward towards the first circles. DO NOT PULL BEFORE 0. THE BOSS WILL LEAP TO YOU FIRST AND YOU WILL DIE. Place the first Firestorm circles in an L shape like the picture below with melee and ranged gravitating towards the suggested locations.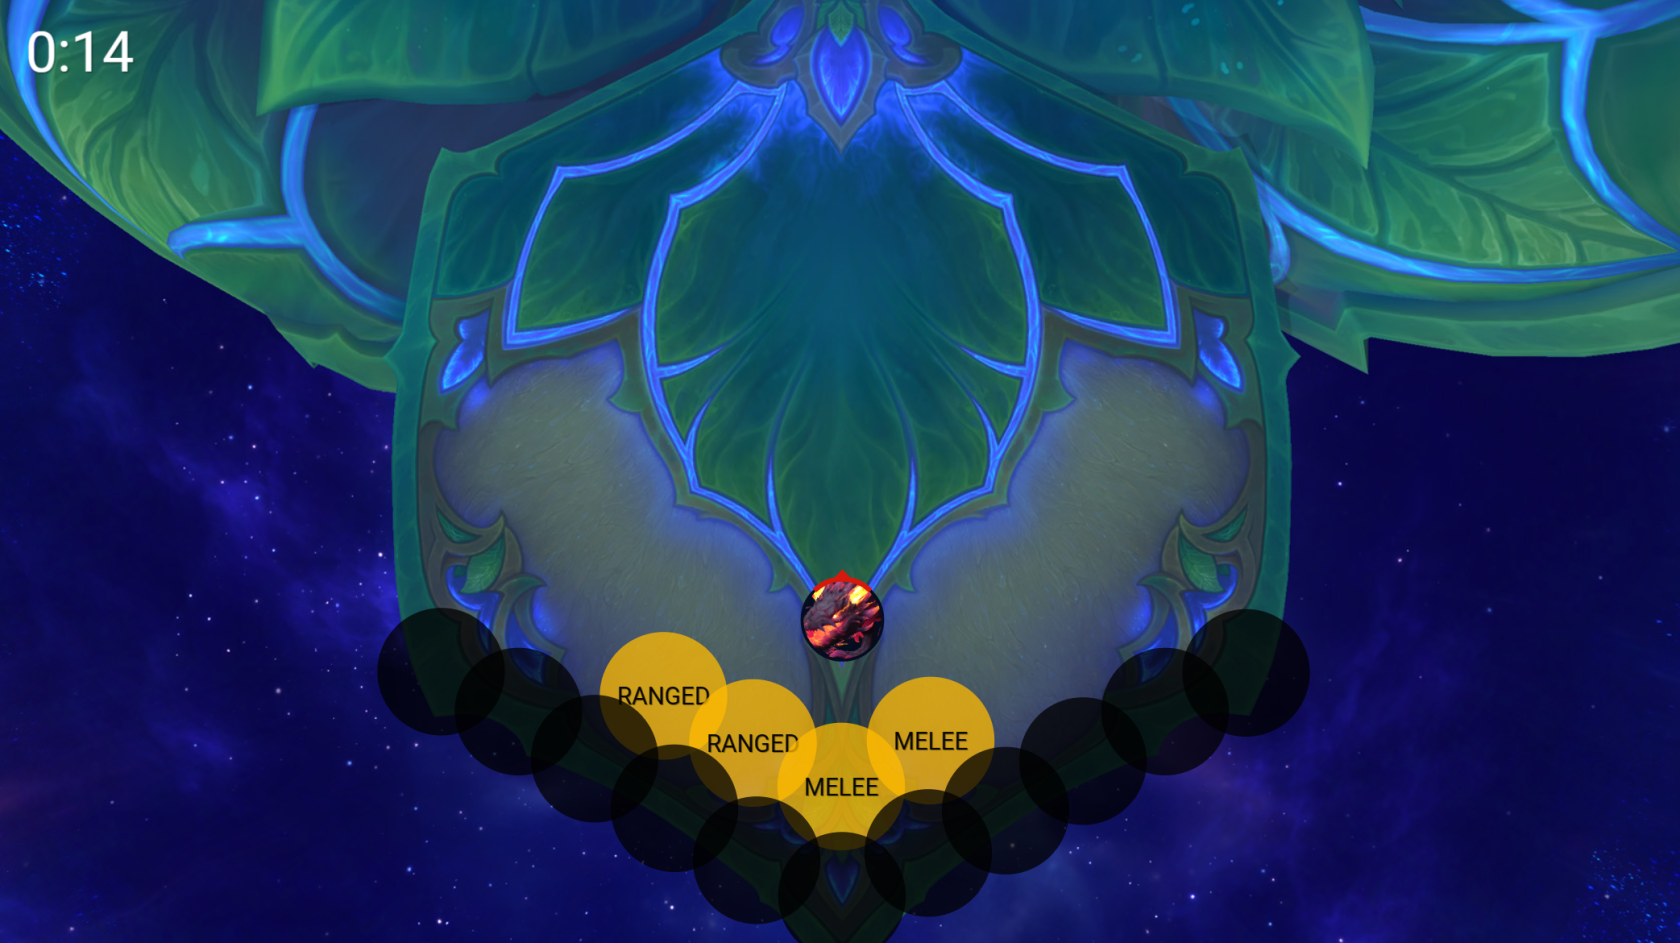
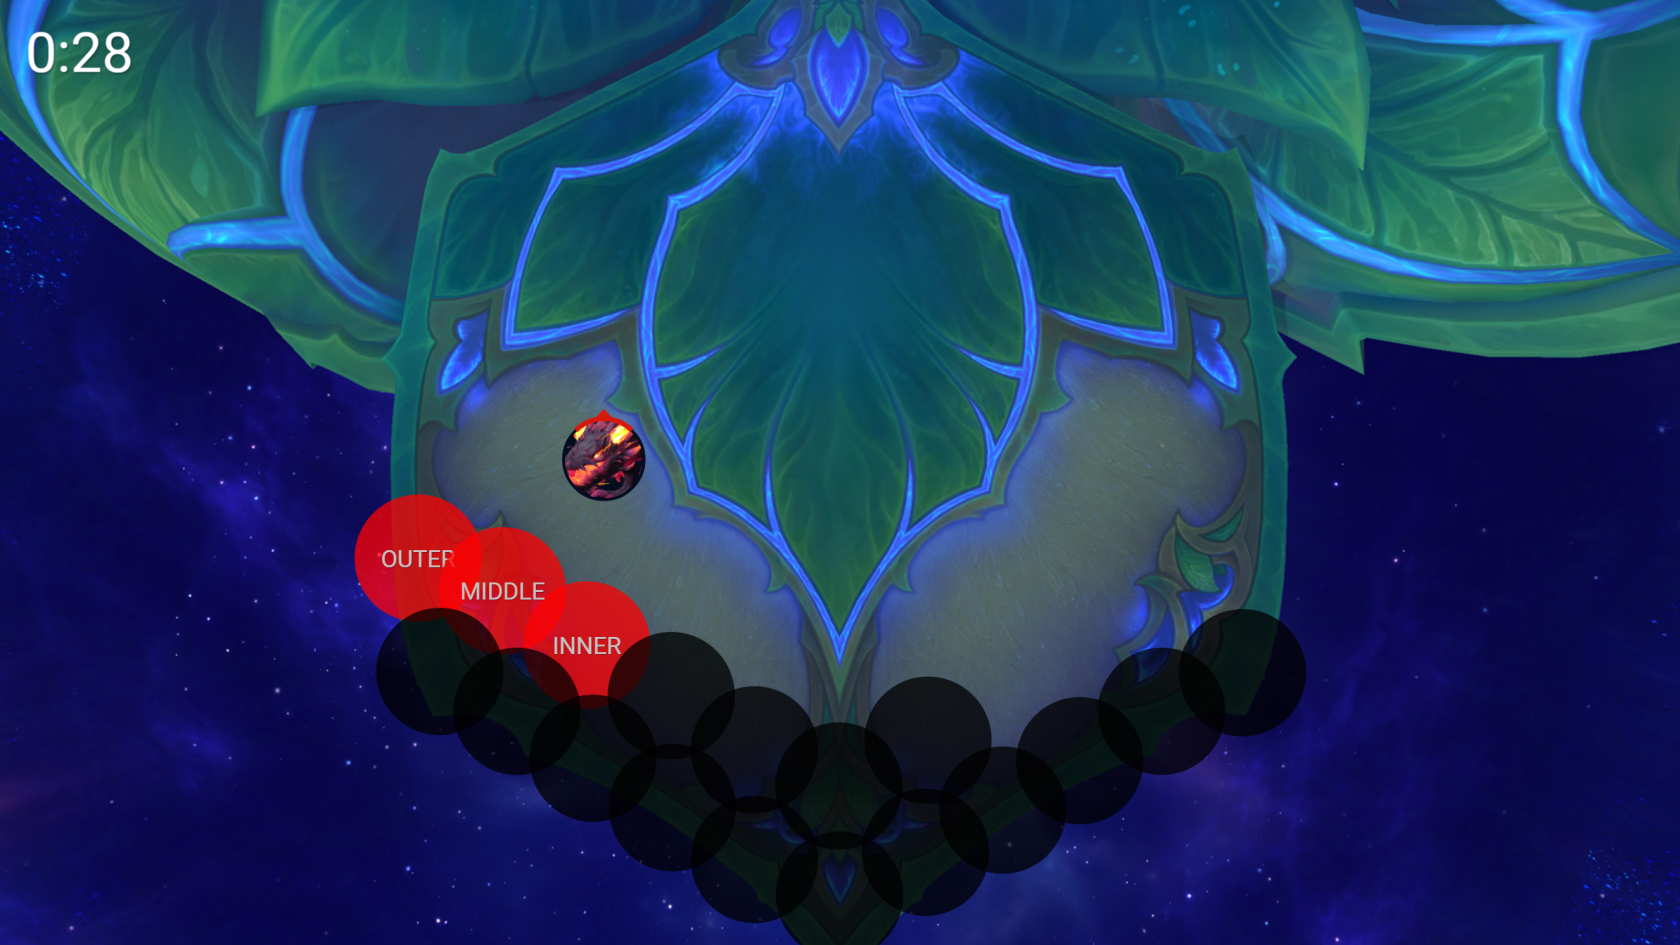
Drag the boss to the western edge to prepare for the first Darkflame Cleave. Check the assignments sheet for which circle you are supposed to soak. This is a private aura mechanic, so players with the cleave need to pick a position quickly.
- DPS & Healers: Do not stand in the overlap between two circles or you will take 200% extra damage.
- Tanks: Stand in the overlap between Right and Middle with a defensive and try to soak both.
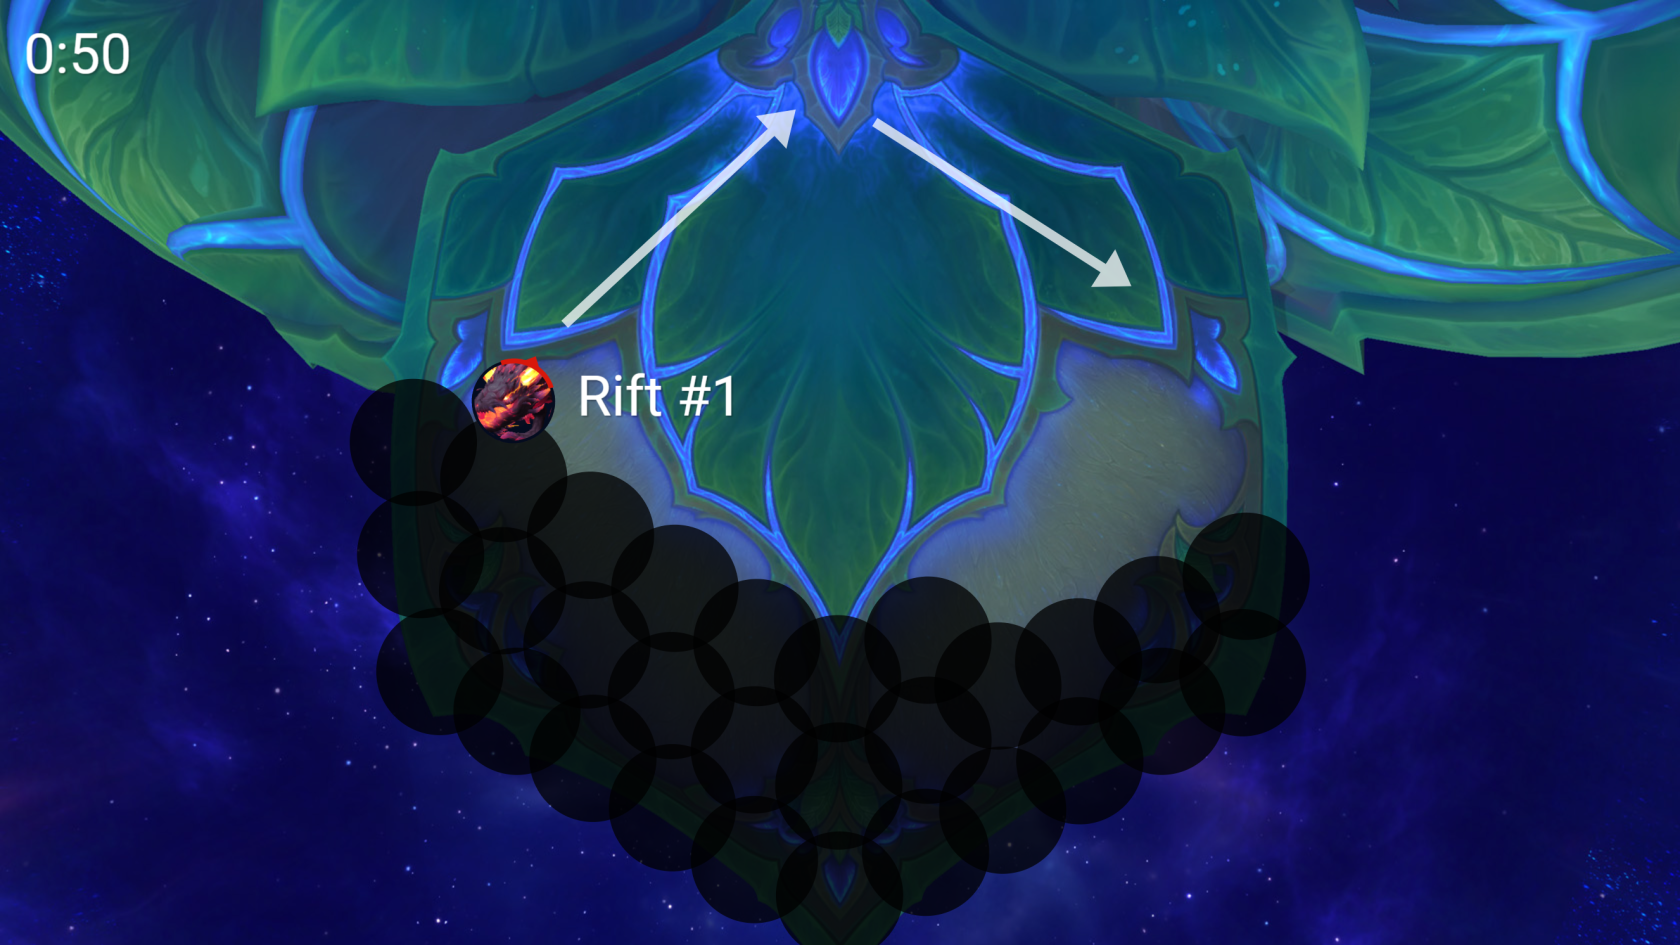
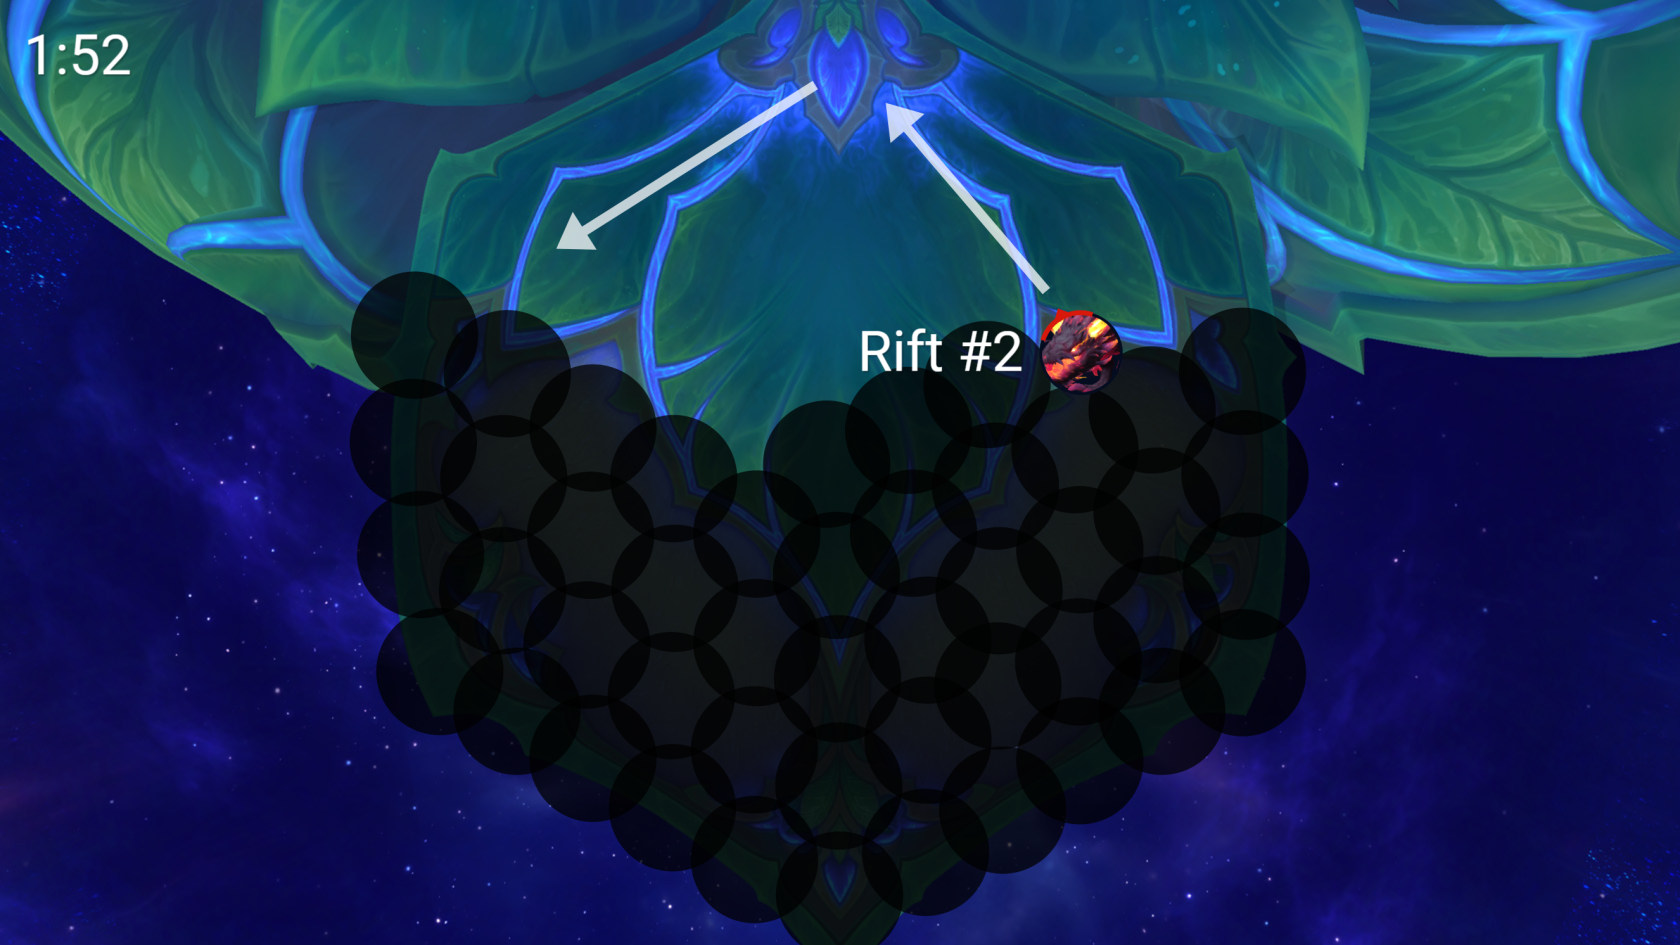
Fyrakk will cast the first Dream Rend rift. On Mythic, the rift will launch Dark Embers at the raid. We want to move toward the back of the platform first to bait them and then dodge them by moving toward the eastern edge.
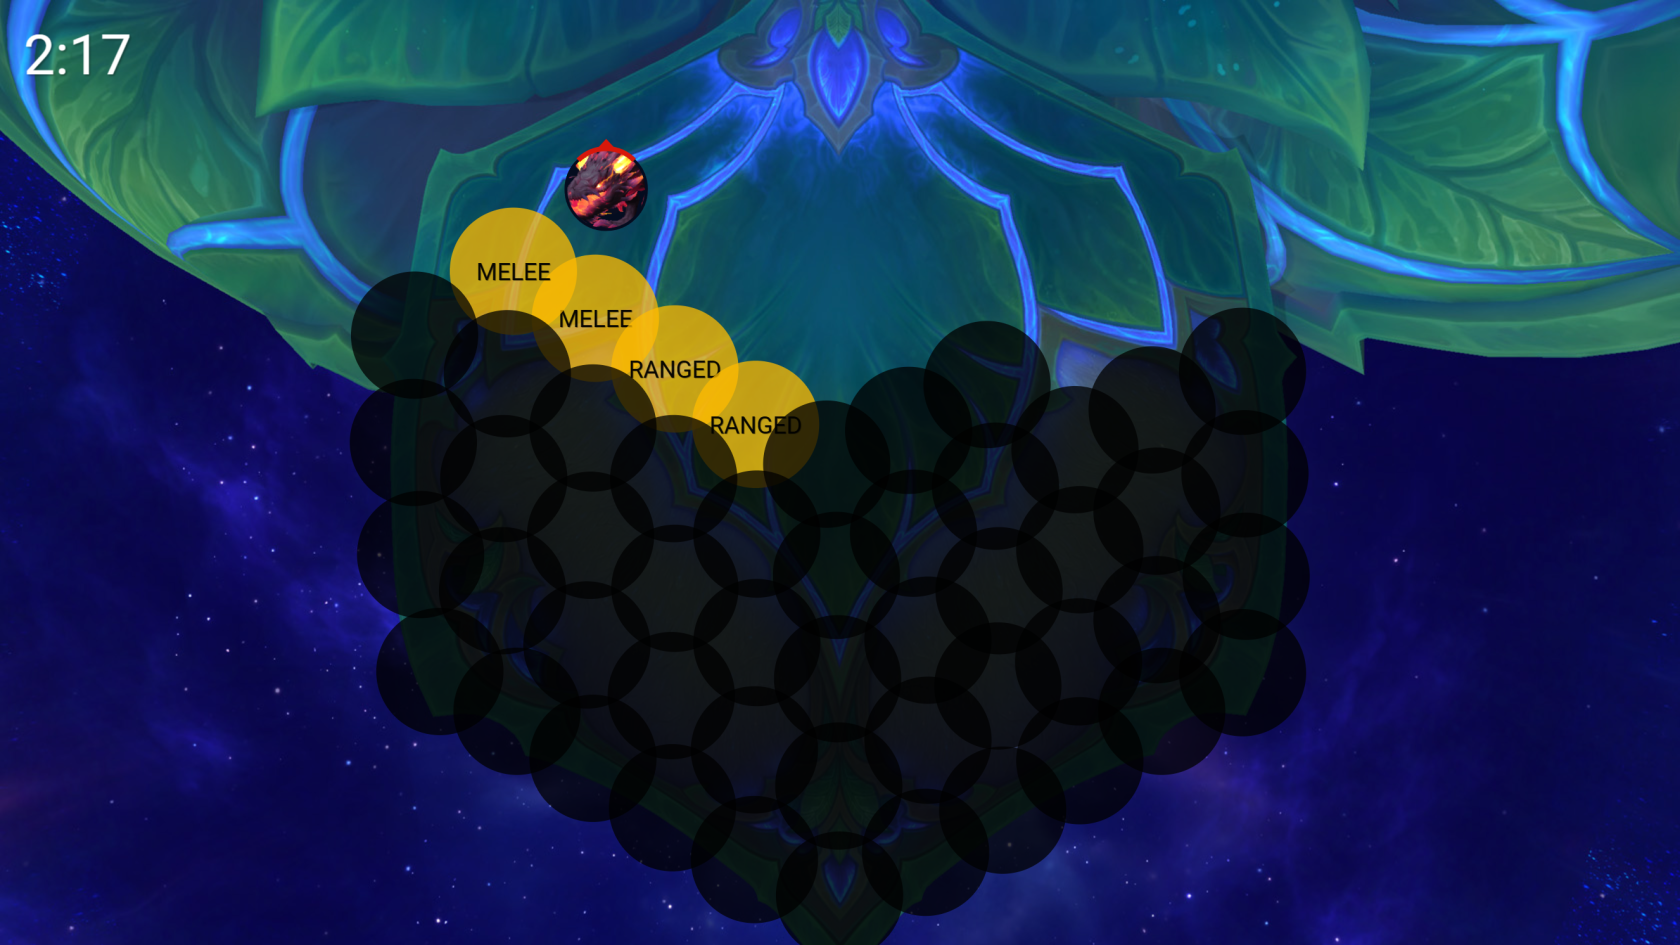
Place the second Firestorm circles on the eastern side with melee and ranged gravitating to the spots marked below. If we placed the first Firestorm in the correct L-shape position, there will be exactly 4 spaces open for these.
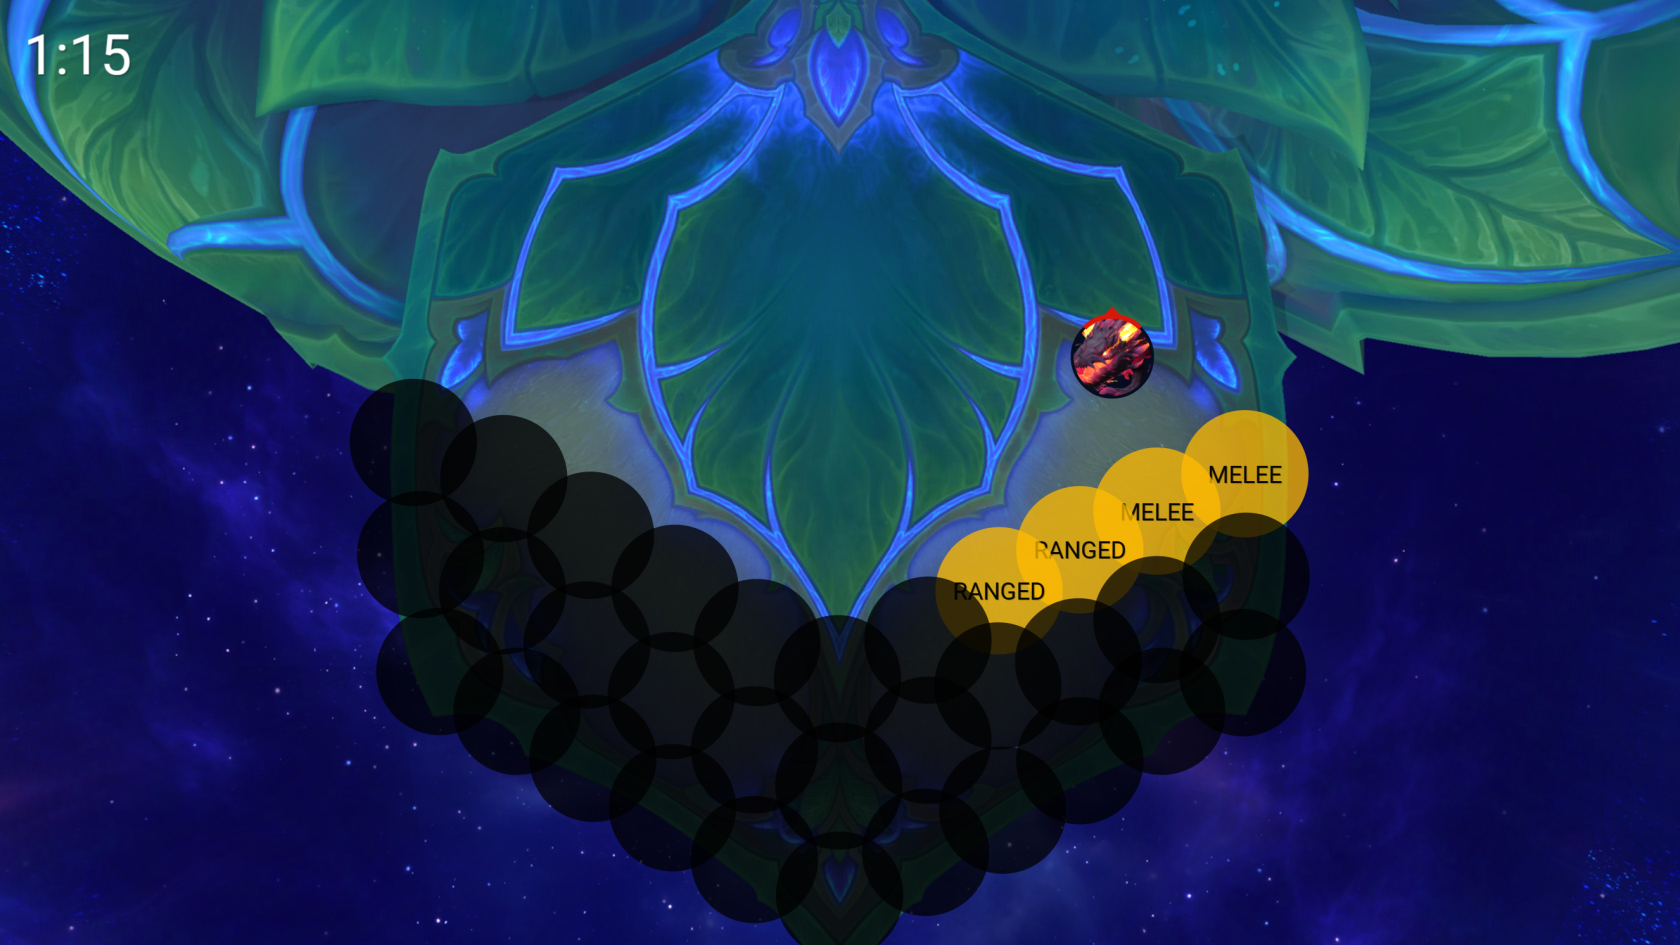
Move to the center and prepare for the second Darkflame Cleave soaks. Tanks should again stand in the overlap between Right and Middle to try and soak both. This positioning will leave 5 spaces available on the western side for the final Firestorm cast.
Fyrakk will cast the second Dream Rend rift. For this rift, perform the same maneuver as the first rift but in the other direction. Bait the Dark Embers towards the back of the platform, then dodge them by moving to the western edge.
Line up the final set of 4 Firestorm puddles. Melee and ranged should gravitate towards the positions marked below.
With the 10% health nerf, we should be pushing shortly after this Firestorm cast.
Intermission
SoonTMAs soon as the intermission starts you will be debuffed with either Flamebound or Shadowbound. The Liquid pack will assign you to one of nine positions around the boss:
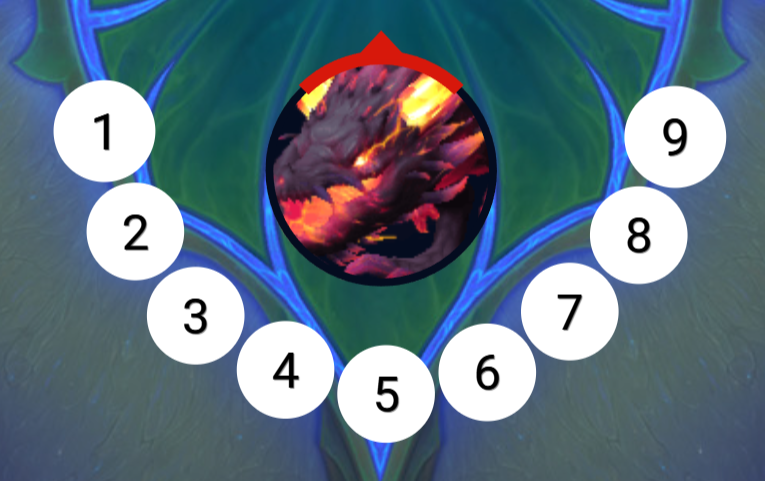
Go to that position, check which color you are and soak your appropriate orb. Watch the Dratnos intermission video linked below for an explanation of how to figure out which orb is yours.
There are three waves of orbs. All players will watch and soak orbs during the first two waves. Try to minimize movement so you can keep up DPS on the shield. When the third wave spawns, we will use three paladin bubbles and a spell bop to clear as many orbs as we can. Watch for any orbs that get through the immunities and soak them while finishing the shield.

Phase 2
SoonTM
Phase 3
SoonTM
Raid Plans
Reference Logs
All of these logs are post HoF nerfs and use our tank and healer comp (see more here):
- Offline (8:43, top execution with our comp)
- Ethical (9:17)
- The Family Business (9:38)
- poptart corndoG (9:46)
WeakAuras
- Liquid - Amirdrassil
- Liquid - Anchors
- Liquid - Utilities
- CC Coordinator - Used for add stops in 2nd Intermission