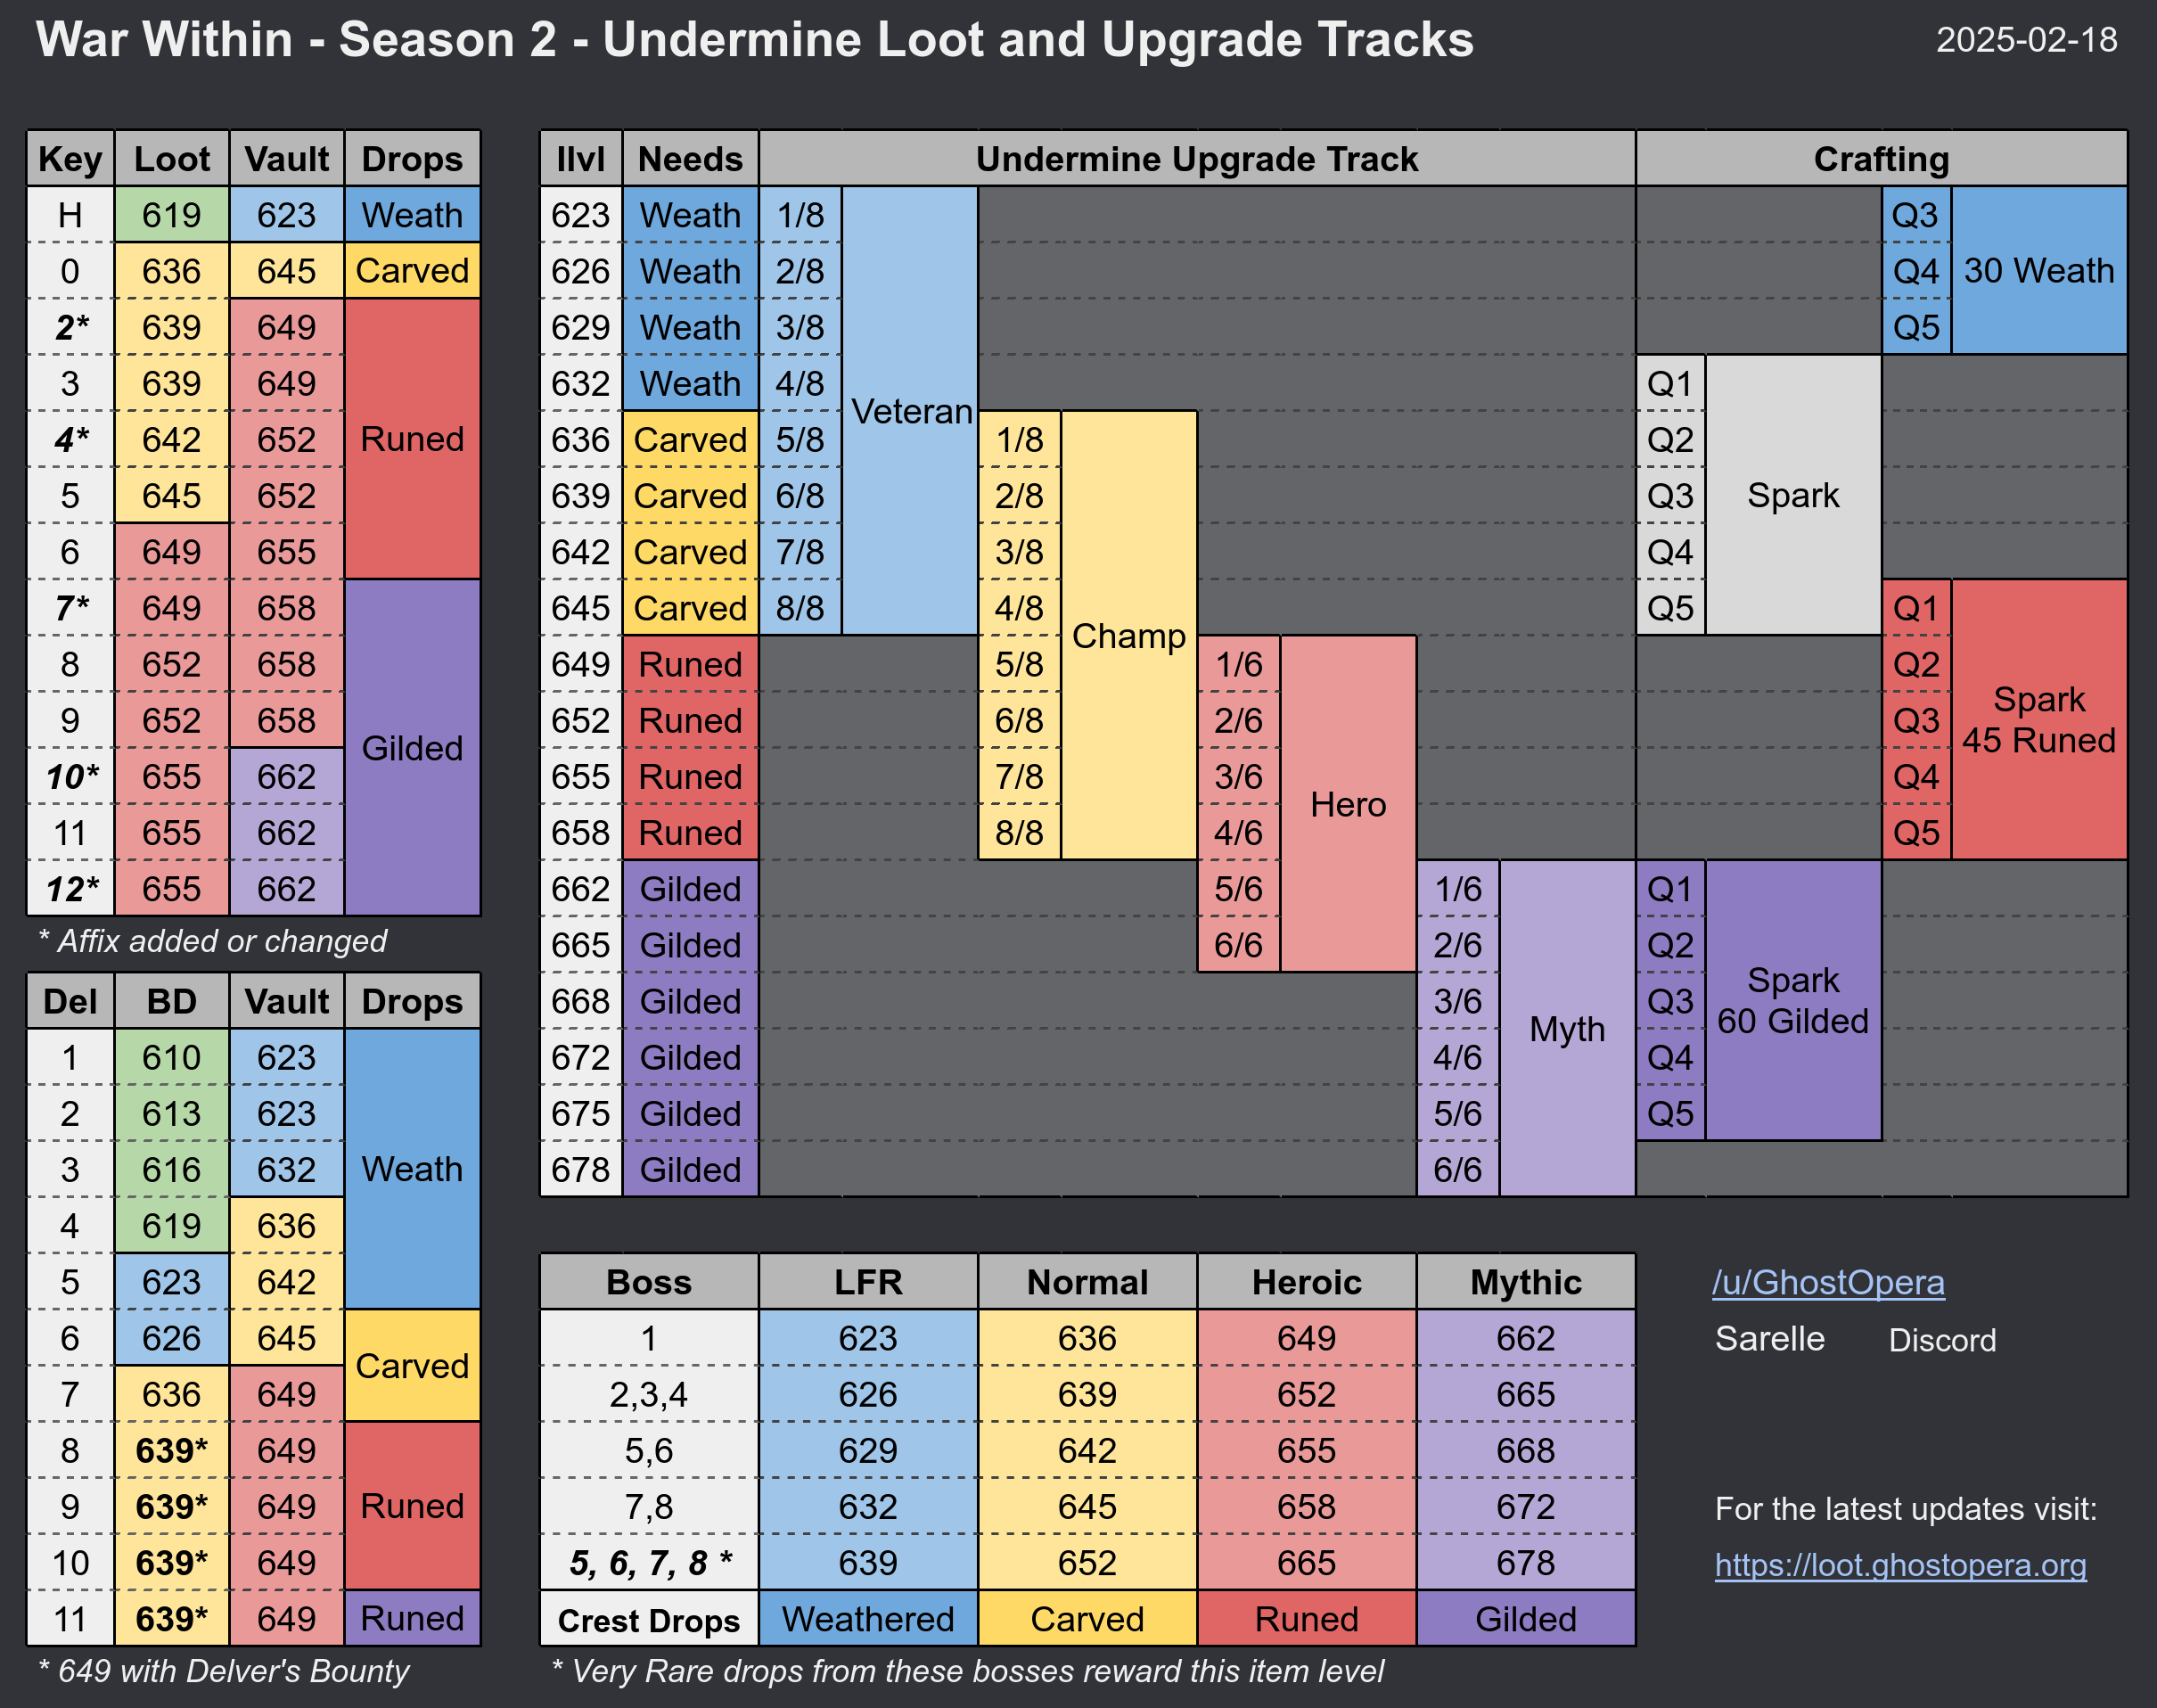
11 - The War Within Raid Strategies
TMDM's raid boss strategies for The War Within expansion.
- Boss Page Template
- Nerub'ar Palace
- Ulgrax the Devourer
- The Bloodbound Horror
- Sikran
- Rasha'nan
- Broodtwister Ovi'nax
- Nexus-Princess Ky'veza
- The Silken Court
- Queen Ansurek
- Liberation of Undermine
- Patch 11.1 General Info
- Vexie Fullthrottle and The Geargrinders
- Cauldron of Carnage
- Rik Reverb
- Stix Bunkjunker
- Sprocketmonger Lockenstock
- One-Armed Bandit
- Mug'Zee
- Chrome King Gallywix
- Manaforge Omega
Boss Page Template
|
|
Strategy
Notes about our strategy here for newcomers to the raid. Include images where appropriate to visualize the positioning.
Raid Plans
- Links to raid plans so we can edit them in the future.
Reference Logs
- Links to existing kills with similar strategies or comps.
WeakAuras
- Links to required WAs for the fight.
Video Guides
- Ready Check Pull (Heroic)
Note
This is a test
Nerub'ar Palace
Ulgrax the Devourer
|
|
|
Strategy
Notes about our strategy here for newcomers to the raid. Include images where appropriate to visualize the positioning.
Raid Plans
- Links to raid plans so we can edit them in the future.
Reference Logs
- Links to existing kills with similar strategies or comps.
WeakAuras
- Links to required WAs for the fight.
Video Guides
- Ready Check Pull (Heroic)
Note
This is a test
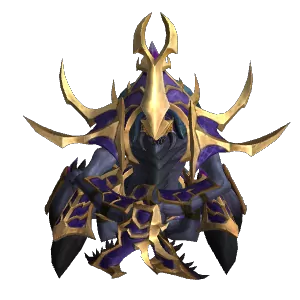
The Bloodbound Horror
|
|
|
Strategy
Notes about our strategy here for newcomers to the raid. Include images where appropriate to visualize the positioning.
Raid Plans
- Links to raid plans so we can edit them in the future.
Reference Logs
- Links to existing kills with similar strategies or comps.
WeakAuras
- Links to required WAs for the fight.
Video Guides
- Ready Check Pull (Heroic)
Note
This is a test
Sikran
|
|
|
Strategy
Notes about our strategy here for newcomers to the raid. Include images where appropriate to visualize the positioning.
Raid Plans
- Links to raid plans so we can edit them in the future.
Reference Logs
- Links to existing kills with similar strategies or comps.
WeakAuras
- Links to required WAs for the fight.
Video Guides
- Ready Check Pull (Heroic)
Note
This is a test
Rasha'nan
|
|
|

Strategy
Notes about our strategy here for newcomers to the raid. Include images where appropriate to visualize the positioning.
Raid Plans
- Links to raid plans so we can edit them in the future.
Reference Logs
- Links to existing kills with similar strategies or comps.
WeakAuras
- Links to required WAs for the fight.
Video Guides
- Ready Check Pull (Heroic)
Note
This is a test
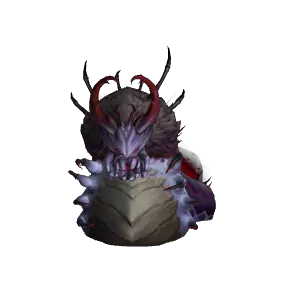
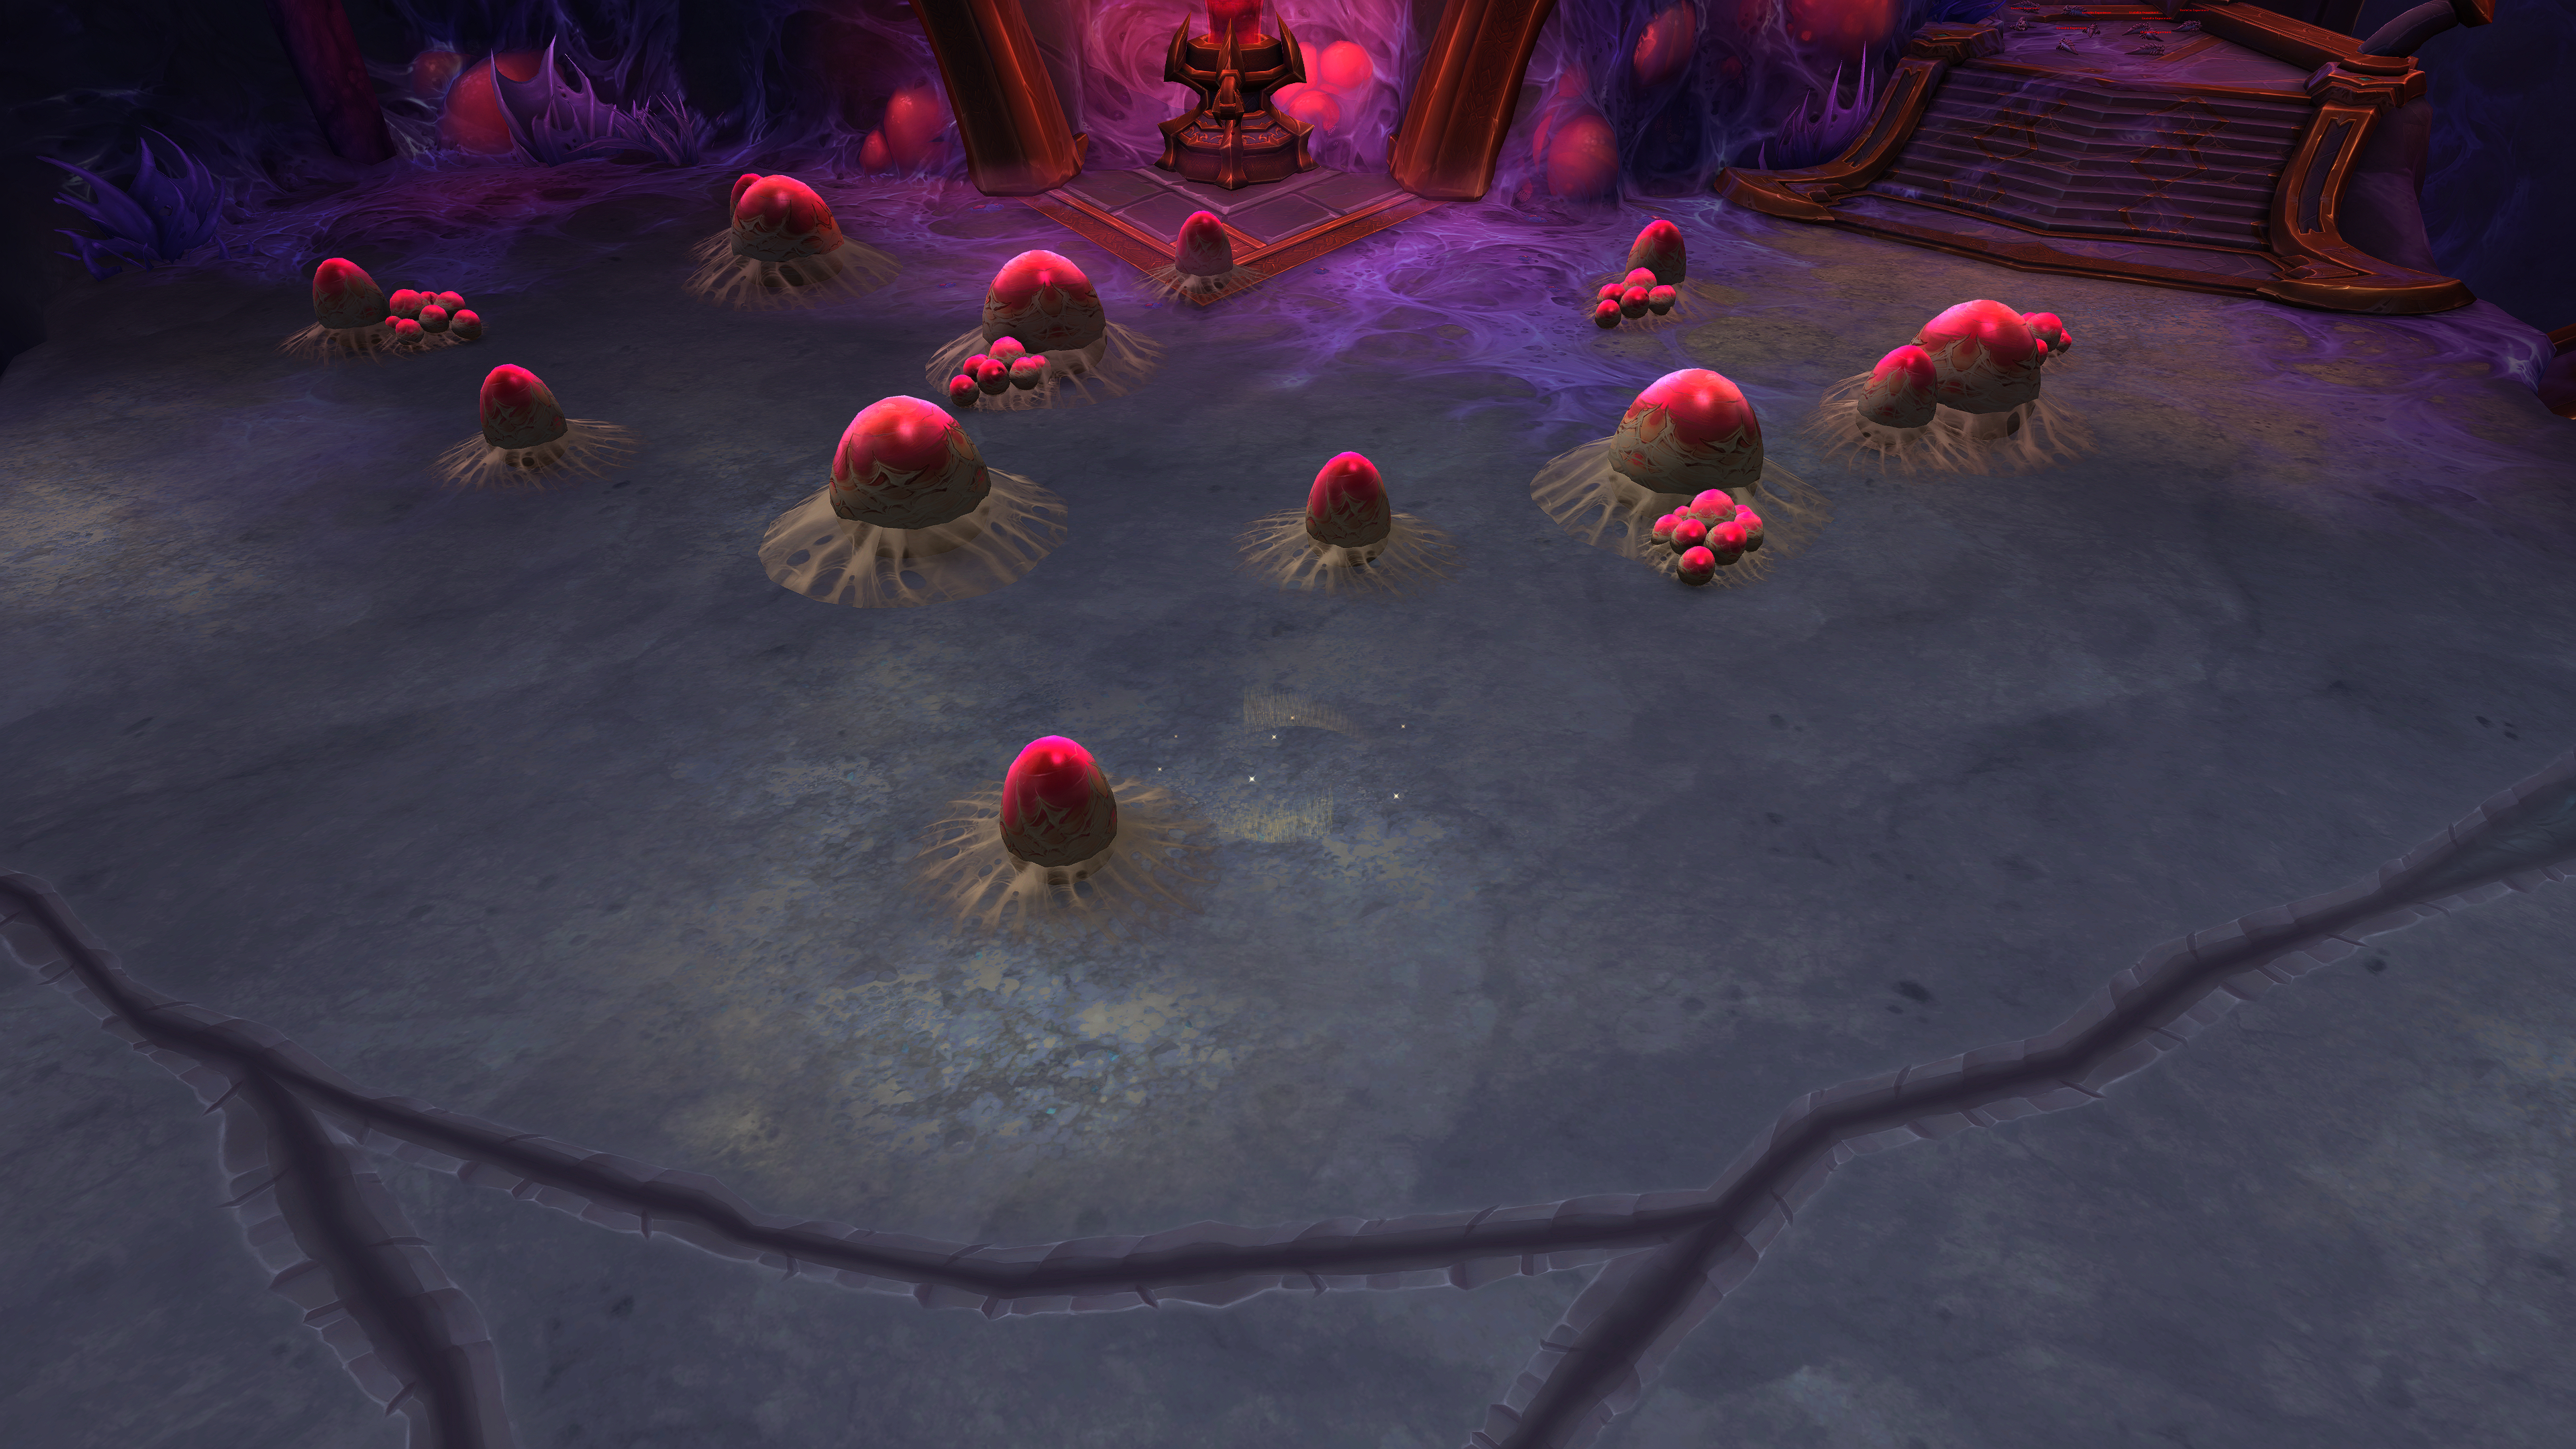
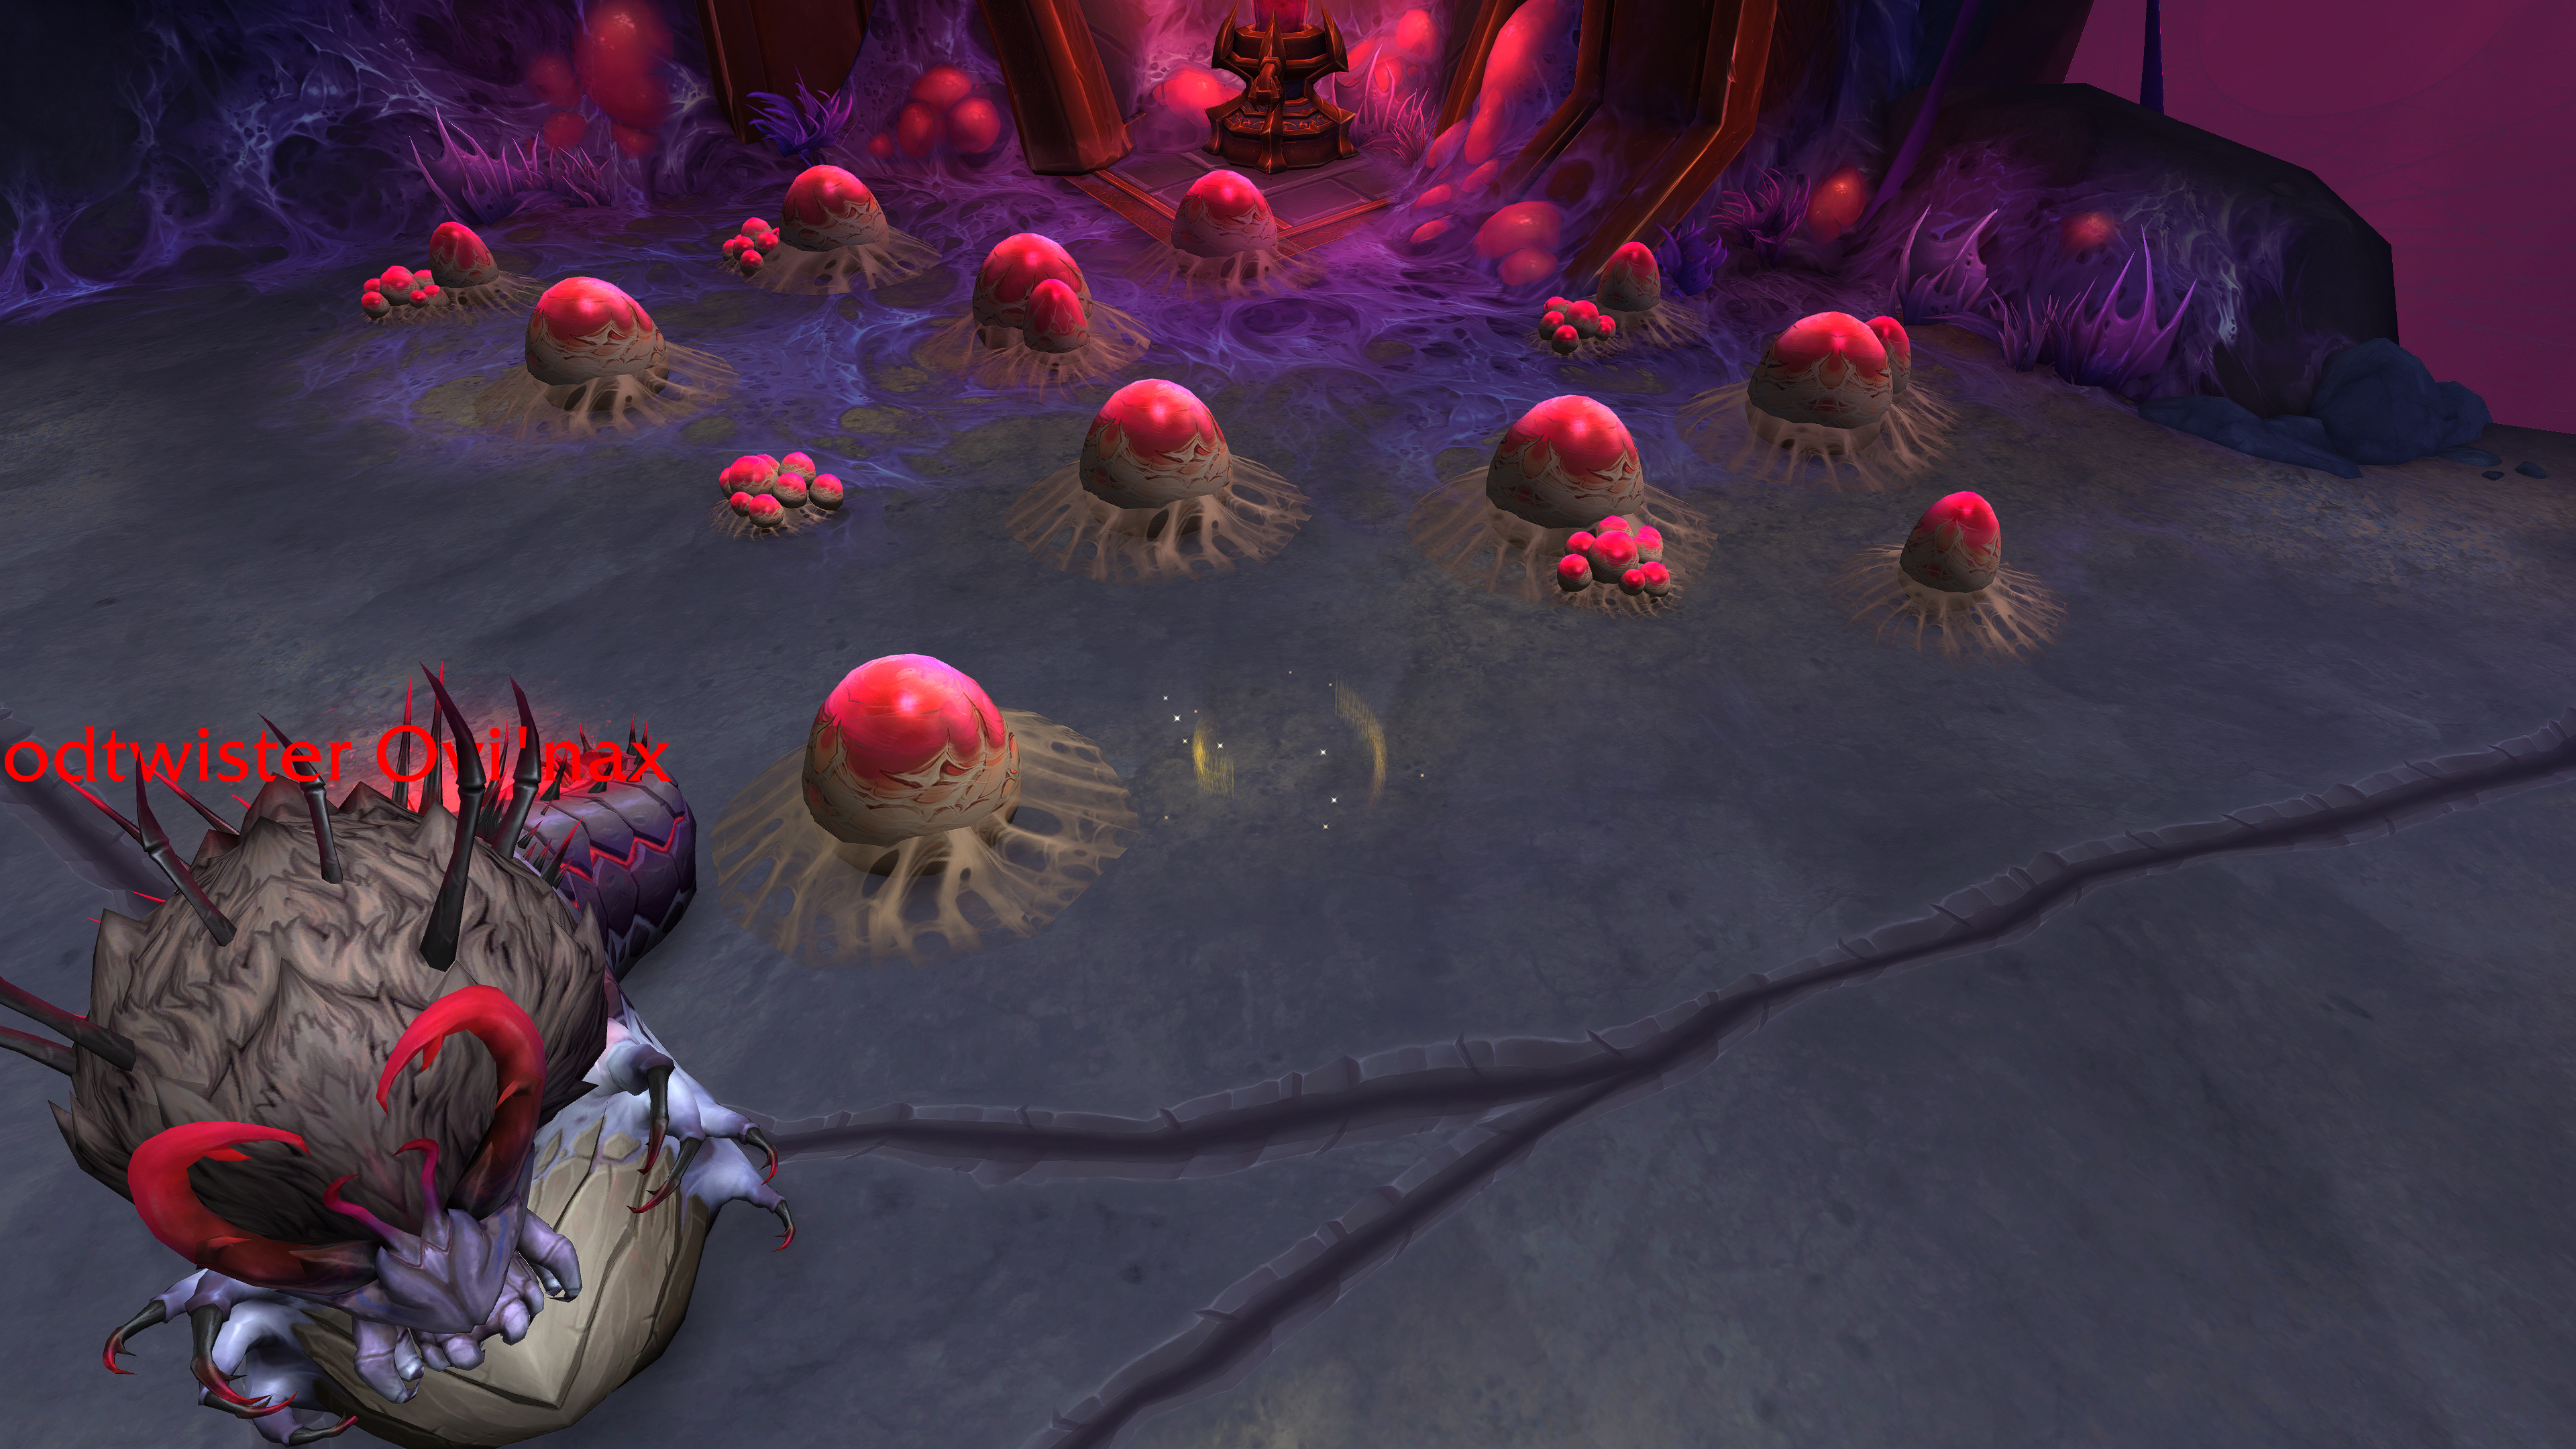
Broodtwister Ovi'nax
|
|
|
Room Layout
On Mythic, the room has the following layout:
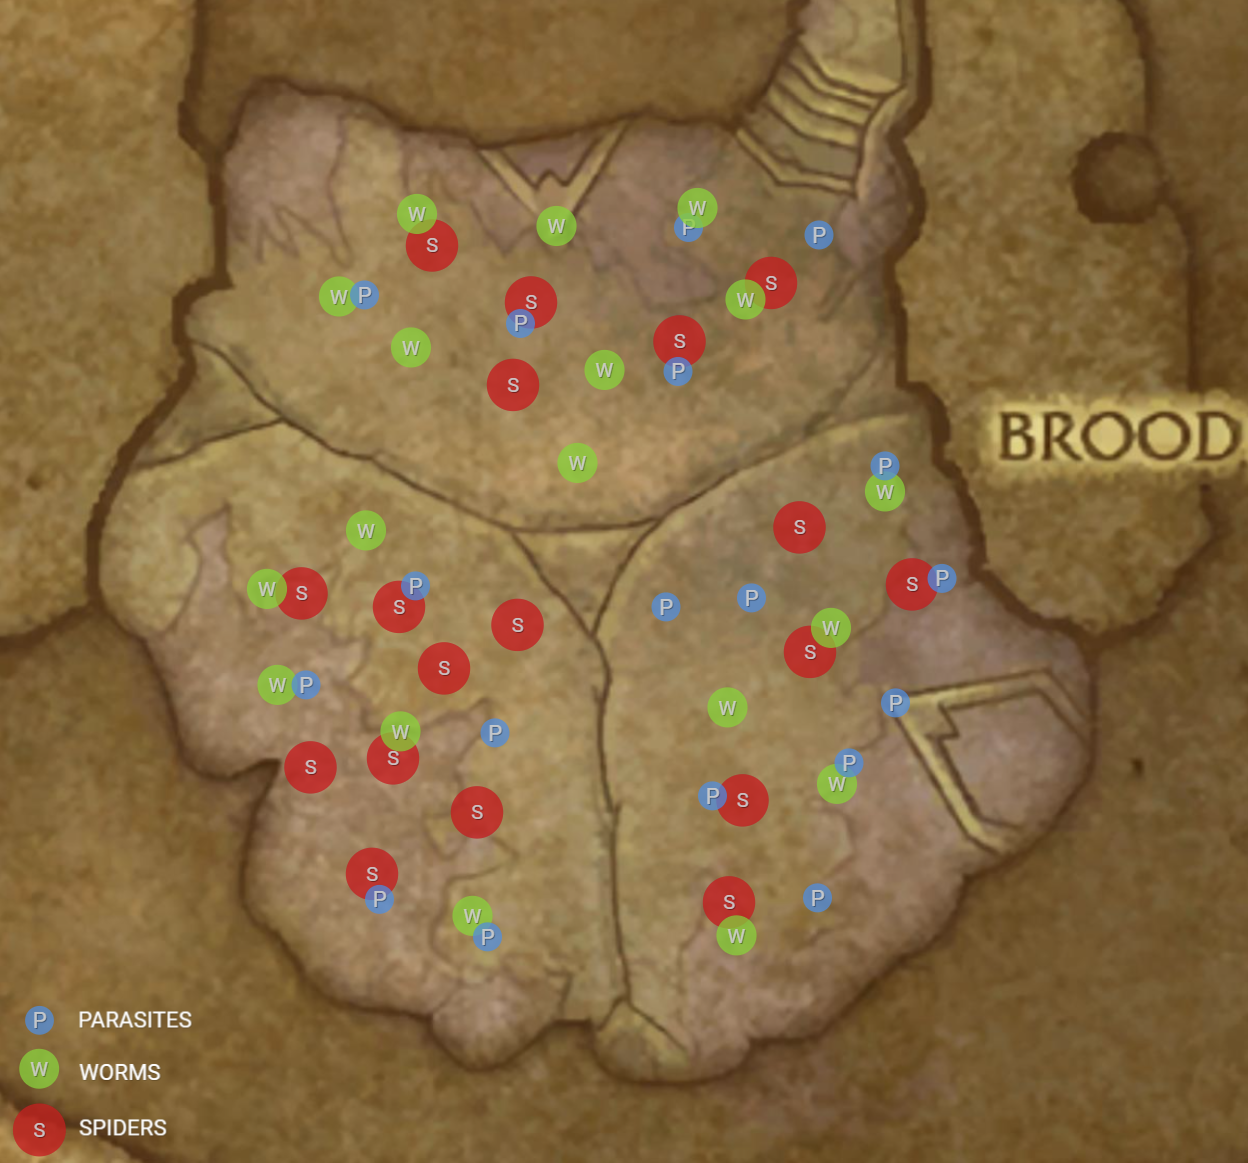
Parasite Section

Worm Section
Spider Section
Strategy
Notes about our strategy here for newcomers to the raid. Include images where appropriate to visualize the positioning.
Raid Plans
Reference Logs
- Ethical (2 DK + Evo/Monk/Priest)
- Phoenix (2 DK + Evo/Shaman/Priest/Paladin)
- Slack (2 DK + Monk/Paladin/Priest/Shaman)
- syg (2 DK + Evo/Shaman/Priest/Paladin)
WeakAuras
Video Guides
- Ready Check Pull (Heroic)
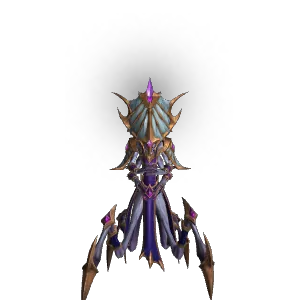
Nexus-Princess Ky'veza
|
|
|

Strategy
Notes about our strategy here for newcomers to the raid. Include images where appropriate to visualize the positioning.
Raid Plans
Reference Logs
- Links to existing kills with similar strategies or comps.
WeakAuras
- Links to required WAs for the fight.
Video Guides
- Ready Check Pull (Heroic)
Note
This is a test
The Silken Court
|
|
|
|
Strategy
Notes about our strategy here for newcomers to the raid. Include images where appropriate to visualize the positioning.
Raid Plans
Reference Logs
- Links to existing kills with similar strategies or comps.
WeakAuras
- Links to required WAs for the fight.
Video Guides
- Ready Check Pull (Heroic)
Note
This is a test
Queen Ansurek
|
|
|

Strategy
Notes about our strategy here for newcomers to the raid. Include images where appropriate to visualize the positioning.
Raid Plans
- Links to raid plans so we can edit them in the future.
Reference Logs
- Links to existing kills with similar strategies or comps.
WeakAuras
- Links to required WAs for the fight.
Video Guides
- Ready Check Pull (Heroic Prediction)
Note
This is a test
Liberation of Undermine
Patch 11.1 General Info
Useful Links
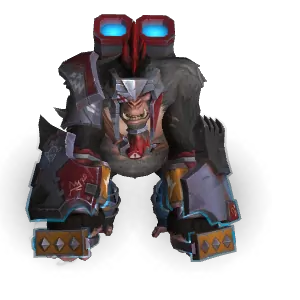
Vexie Fullthrottle and The Geargrinders
|
|

Strategy

Raid Plans
- Links to raid plans so we can edit them in the future.
Reference Logs
- Links to existing kills with similar strategies or comps.
WeakAuras
- Links to required WAs for the fight.
Video Guides
- Ready Check Pull (Heroic)
Note
This is a test
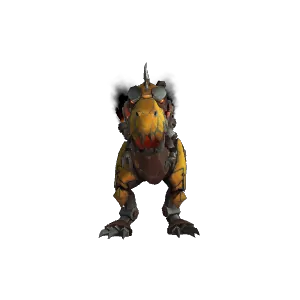
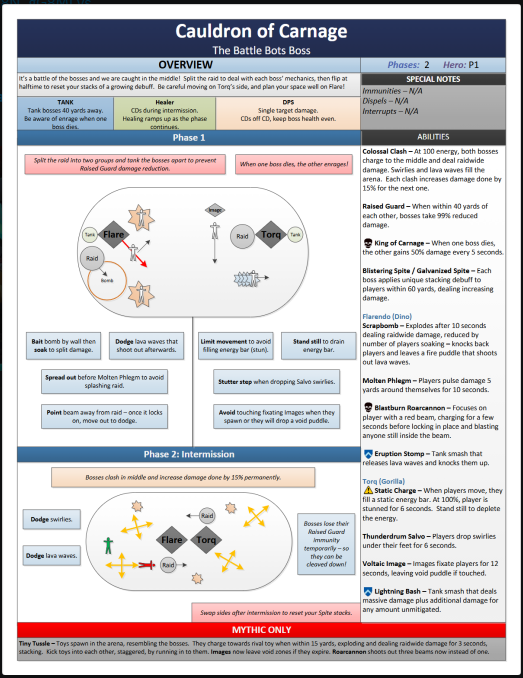
Cauldron of Carnage
|
|
Strategy
Raid Plans
- Links to raid plans so we can edit them in the future.
Reference Logs
- Links to existing kills with similar strategies or comps.
WeakAuras
- Links to required WAs for the fight.
Video Guides
- Ready Check Pull (Heroic)
Note
This is a test
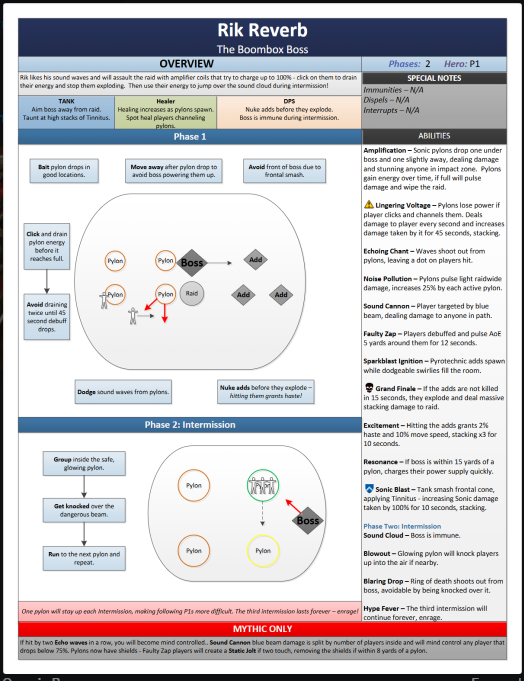
Rik Reverb
|
|

Strategy
Raid Plans
- Links to raid plans so we can edit them in the future.
Reference Logs
- Links to existing kills with similar strategies or comps.
WeakAuras
- Links to required WAs for the fight.
Video Guides
- Ready Check Pull (Heroic)
Note
This is a test
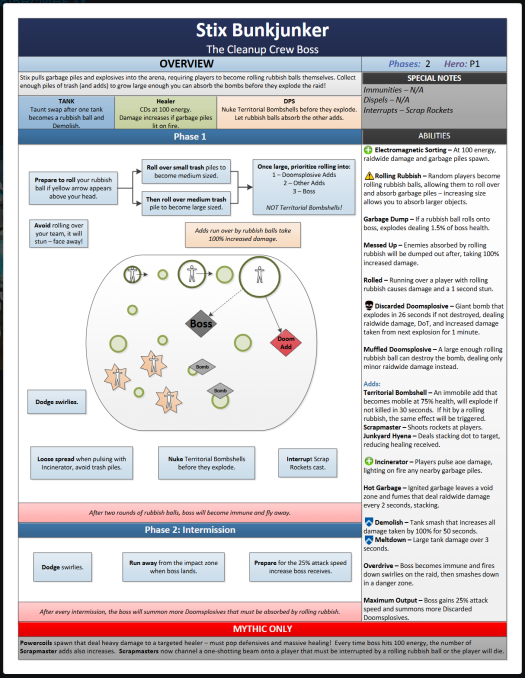
Stix Bunkjunker
|
|

Strategy
Raid Plans
- Links to raid plans so we can edit them in the future.
Reference Logs
- Links to existing kills with similar strategies or comps.
WeakAuras
- Links to required WAs for the fight.
Video Guides
- Ready Check Pull (Heroic)
Note
This is a test
Sprocketmonger Lockenstock
|
|

Strategy

Raid Plans
- Links to raid plans so we can edit them in the future.
Reference Logs
- Links to existing kills with similar strategies or comps.
WeakAuras
- Links to required WAs for the fight.
Video Guides
- Ready Check Pull (Heroic)
Note
This is a test
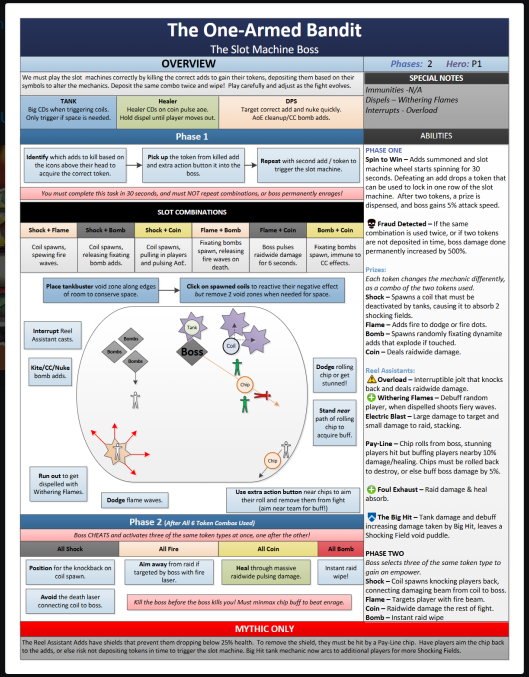
One-Armed Bandit
|
|

Strategy
Raid Plans
- Links to raid plans so we can edit them in the future.
Reference Logs
Pay-Line + Dark Lined Cuirass
Up the Ante + The Big Hit
WeakAuras
Video Guides
- Ready Check Pull (Heroic)
Note
This is a test
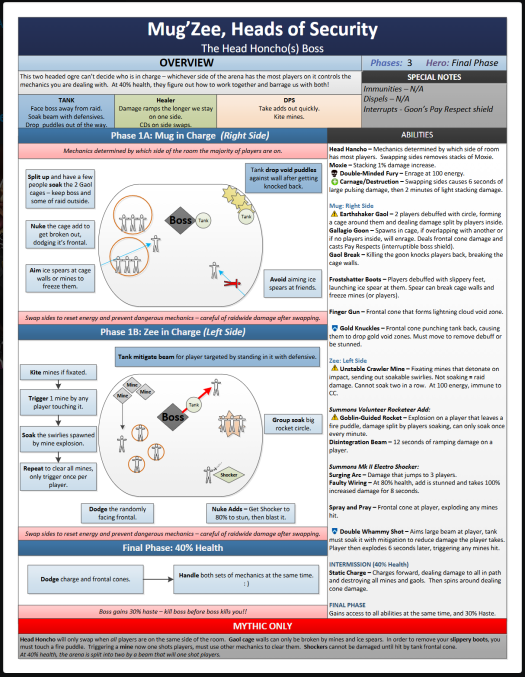
Mug'Zee
|
|

Strategy
Raid Plans
- Links to raid plans so we can edit them in the future.
Reference Logs
- Links to existing kills with similar strategies or comps.
WeakAuras
- Links to required WAs for the fight.
Video Guides
- Ready Check Pull (Heroic)
Note
This is a test
Chrome King Gallywix
|
|
Strategy
Notes about our strategy here for newcomers to the raid. Include images where appropriate to visualize the positioning.
Raid Plans
- Links to raid plans so we can edit them in the future.
Reference Logs
- Links to existing kills with similar strategies or comps.
WeakAuras
- Links to required WAs for the fight.
Video Guides
- Ready Check Pull (Heroic)
Note
This is a test
Manaforge Omega
Plexus Sentinel
Giant Asshole Robot
|
|

Strategy
Raid Plans
- Links to raid plans so we can edit them in the future.
Reference Logs
- Euphoric - Stonemaul (US)
- Ravens of the North - Azralon (US)
- Nurfed - Tichondrius (US)
- No Skill - Tichondrius (US)
- Agency - Zul'jin (US)
WeakAuras
- Links to required WAs for the fight.
Video Guides
Note
This is a test
Loom'ithar
Giant Asshole Moth
|
|
Strategy
Raid Plans
- Links to raid plans so we can edit them in the future.
Reference Logs
- Euphoric - Stonemaul (US)
- Ravens of the North - Azralon (US)
- Nurfed - Tichondrius (US)
- No Skill - Tichondrius (US)
- Agency - Zul'jin (US)
WeakAuras
- Links to required WAs for the fight.
Video Guides
Note
This is a test
Soulbinder Naazindhri
Giant Asshole Mummy
|
|

Strategy
Raid Plans
- Links to raid plans so we can edit them in the future.
Reference Logs
- Incarnate - Tichondrius (US)
- DMG - Illidan (US)
- Unrivaled - Zul'jin (US)
- Soft Enrage - Area 52 (US)
- fish zoo - Area 52 (US)
WeakAuras
- Links to required WAs for the fight.
Video Guides
Note
This is a test
John Manaforge
Giant Asshole Manaforge
|
|

Strategy
Raid Plans
- Links to raid plans so we can edit them in the future.
Reference Logs
- Nascent - Emerald Dream (US)
- Consequence - Stormrage (US)
- Blur - Tichondrius (US)
- Incarnate - Tichondrius (US)
WeakAuras
- Links to required WAs for the fight.
Video Guides
Note
This is a test
Nexus King Salad Bar
Giant Asshole Dragon Fetishist
|
|

Strategy
Raid Plans
Reference Logs
- Ascended - Ragnaros (US)
- Refined - Zul'jin (US)
- Denial of Service - Burning Blade (US)
- nVus - Mal'Ganis (US)
WeakAuras
Video Guides
Note
This is a test
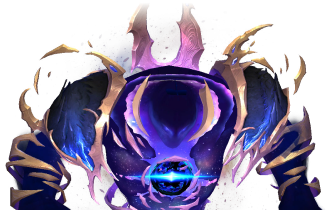
Dimensius
I'm tired of bosses that take this many pulls
|
|
|
Strategy
- Progression Assignments
- Flights:
Raid Plans
- Phase 1
- Phase 2 (first platform)
- Phase 2 (second platform)
- Phase 3
- Gravity Spread Positions (Phase 2, Phase 3)
- Gravity Spread Example with names